Back to Calyxa's Bryce Tutorials
 |
Using Pictures in Bryce Materials
A Tutorial for Bryce versions 3 and later
|
|
I've seen this question a lot, "how do I use a .jpg as a material
in Bryce?"
The answer is, "you don't." Pictures are used as texture
components in Bryce materials. They can provide the coloring,
bump, or "value" of any channel seen in the material lab. And
the other channels don't have to come from the picture, they can
be assigned globally or come from a procedural texture or another
picture.
|
Relating Picture Textures to Procedural Textures
|
I started out with these three images, each in its own separate
file. As a mac user, I worked with these images in pict format,
not in the form displayed here. Note that each picture can be used
to drive any material attribute in the material lab. The phrase
"alpha channel" refers to a fourth channel (in addition to the Red,
Green and Blue channels) which can contain masking or bump
information. It is a rare case when what works for the bump also
works for the mask and vice versa!
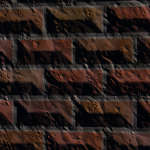
brickcolor.pict
|
brickalpha.pict
|
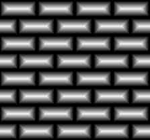
brickbump.pict
|
A procedural texture can have alpha and bump that are different from
each other. In a pict texture, it's best to think of bump as a
special kind of alpha. That's why the three pictures above have to
be in at least two different files - commonly, one file containing
the color and alpha information, and a separate bump file. For this
discussion, it's easiest to assume the three images are in three
different files.
Putting the Image into the Material
|
|
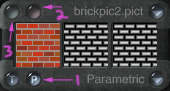
Since the goal is to use the picts in your materials, go into
the material lab. Click any attribute in the A column and a random
texture swatch appears at top right. Click button #1 to change
texture source A from a procedural texture to a 2d pict texture.
Click button #2 to access the 2d pict library.
|
Texture Swatch Palette
|
Once in the 2d pict
library, click an empty small square to load in the color pict. Then
click on 'load' for the center square and load either the alpha or
bump picts. Click the next empty square and similarly load the color
pict with the bump or alpha you didn't pick last time. Once you've
got a couple permutations of the 3 files put into the 2d pict library,
you'll be able to get at them in the material lab during the current
session.
|
Scaling in Shallow Texture Editor
|
Back in the material lab (after you have accepted a pict in the
2d pict library), clicking button #3 brings up the shallow texture
editor. It is also called the "golden tools."
For pict textures, the one that concerns us most is scaling,
the top tool, the numeric output is in percent, and for a
freshly-selected pict, it always reverts to 0. Remember this when
you've been perusing the 2d pict library and grabbed something new.
As an example, if the pict you've chosen to work with is the default
Leo pic, the default scaling of 0% will cover a 2d face with one Leo
image. Taking the scaling up to 20% on each axis will cover the same
2d face with a grid of Leo figures, 16 whole ones and the arms and
legs of many others. This is how you make your bricks smaller.
|
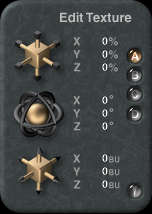
Golden Tools
|
|
Good Ol' ABC Mode
|
If you've read many of my tutorials, you know I'm a big fan of
ABC mode in the Material Lab. I've made a new texture that I use
in ABC blends a lot lately, it's called Nothing. Nothing is just
what it sounds like, a procedural texture with Nothing as the
noise. It should go without saying that Nothing also has no phase.
|
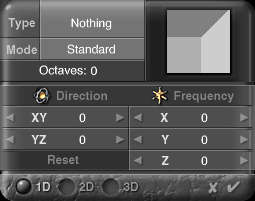
The Nothing Noise
|
| |
Nothing does have a filter, though. It's the clip filter, and
with it, I can make the alpha output of Nothing be anywhere from
solid black to pure white or any shade of grey in between.
|
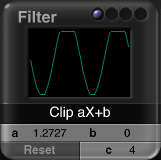
The Filter Dialog
|
|
What Does Nothing Have to do with Picts?
|
Here are three different materials I made using the color and
bump brick images and ABC mode in the Material Lab to combine
those colors and bumps with a procedural texture.
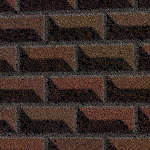
Sandy Bricks
|
Alien Bricks
|

Autumn Bricks
|
At the bottom of the page is what the Material Lab looked like
for the Sandy Bricks material. A small bug -- the nano-preview
of the material has the bump inverted... The power here lies in
that simply changing the filter on the Nothing in channel C
changes how much color and/or bump information taken from the
picture and how much is taken from the procedural A component.
The Autumn Brick material above uses a "real" procedural texture
in the C channel, not just Nothing. That's how some bricks can
appear to be rougher than others.

|
|
Back to Calyxa's Bryce Tutorials
|
|