The sole purpose of this tutorial is to show where the Texture Library is and
how to use it. I've read through chapters 8 and 9 in the Bryce3D manual and
this information is not there. In order to get to where we're going, I'll have
to describe some of the scenery along the way.
Before we go anywhere, though, there's one big question.
What is the difference
between a material and a texture?
The answer is - a material is composed of zero or more textures. Figure 1
shows a material composed of zero textures. Quite a bit can be done with
materials without even touching textures, let alone the Texture Library.
Let's look a little more in depth at Figure 1, in particular, what are those
pink numbered circles all about? The things I circled are little triangle
guys that bring up other menus or dialogs.
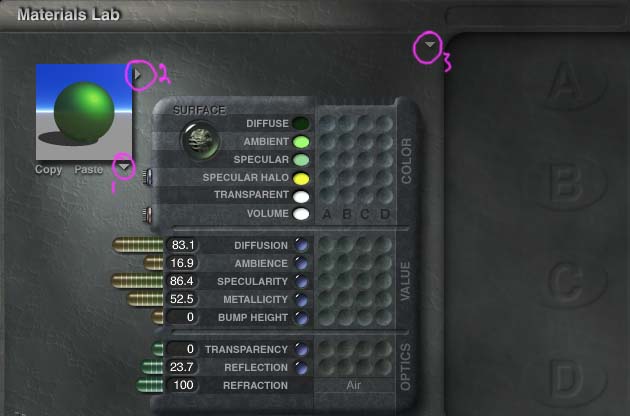
- Preview Options Menu - This menu lets you pick a different object or view for this
little preview window. More info on page 234 of the manual.
- Material Presets Library - This is the same dialog you get clicking on the
triangle next to the Edit menu select thing, or clicking on the
cube-with-a-crack-in-it control on the Edit menu itself. There's some
stuff on this dialog in the manual, but I'll assume most folks are already
familiar with this one. You know the one, Simple and Fast, Planes and Terrains,
Rock and Stones, and so on.
- Material Options Menu - Here's where you can tell your material to
not cast shadows, amongst some other strange options, all detailed in the
manual on pages 225-229.
By the way, no object need be selected first to get into all this fun, the
keyboard shortcut Command-M (Mac) or Control-M (Win) will open the Material Lab
at any time. After you edit your new material, you can use that second triangle
guy to then save your material as a preset.
That's it for the almost-hidden triangle menu things you may have missed.
I was thinking of cropping Figure 1 down even further, but then thought there
might be a riot if everyone couldn't see the settings I have for that Candy
Apple Green material showing in the preview. ;-)
Now onward, to the Texture Library!
The first place you get a glimpse of the Texture Library is in the upper right
corner of each texture component, A, B, C or D. Here's one with the first level
of the Texture Library opened up (done by clicking the triangle thing inside of
the circle at the end of the texture name 'beveled tiles'):
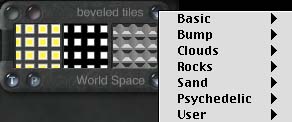
Remember those menu titles, you'll see them again shortly. The next stop along
the way is the Texture Source Editor (also called the Deep Texture Editor, or DTE).
You get there via the pinker of the two buttons in the upper left corner of a
texture component.
I'm not going to touch the DTE with a 10 foot pole here. You can find excellent
information about what all that stuff does in Susan Kitchens' book
Real World Bryce 2 (the functionality is the same, though the interface is
different). There is also some mediocre information on the DTE
in the Bryce3D manual on pages 240-276 (basically all of chapter 9...).
HOWEVER, I will show you this little picture:
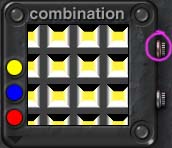
The small stop-watch-reset-button thing circled in pink is what brings up the
Texture Library dialog. It looks and acts very much like the Material Presets
Library, but with some differences which may look somewhat familiar...
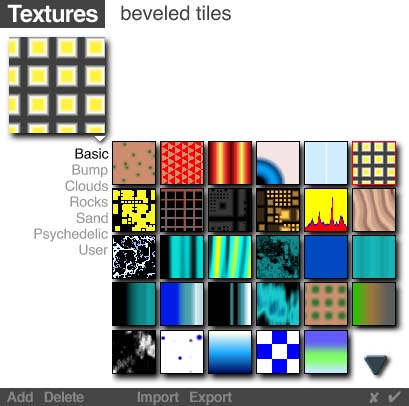
Check out those categories! They're the same as that menu of pull-rights
accessed from that button/triangle hybrid thing on the texture component.
So, if you've ever wondered how to get the texture A out of material 'Foo'
and use it as texture C of material 'Bar', all you have to do is 'Add' it
into the Texture Library and then you can get it back out again from that
pop-up for texture C.
UPDATE! There's a shorter way to get to the secret texture library
than by going through the DTE. If you shift-click the button that gives you
the menu titles, the texture library is displayed in its full graphical
glory!
