I also thought about the yard and my promise of creating a sacred space. Those of you who know me know that I have a certain fondness and fascination for the hexagon. I wanted to build some sort of labyrinth and if it could be hexagonal, all the better. But I also didn't want to take up too much space, since I also hope to put in some raised beds for a vegetable garden.
When I found these concrete edge pieces at the local hardware store on
2 October 2009, I realized my dream of a hexagonal labyrinth might be
attainable within the year. What I had wanted in the beginning was
hexagonal stepping stones, which used to be quite popular, but I
couldn't find them anywhere.

This is the south-west corner of the back yard, also taken on 2 Oct.,
looking at the south property line, with the west boundary at the right
edge of the photo. The left edge of the photo is where the back of the
house is, and that bush on the left has since been removed. The corner
of the house just out of frame there is my sanctum sanctorum. Most of
the rest of the photos are taken from this same vantage point, though
they're all cropped a little differently.
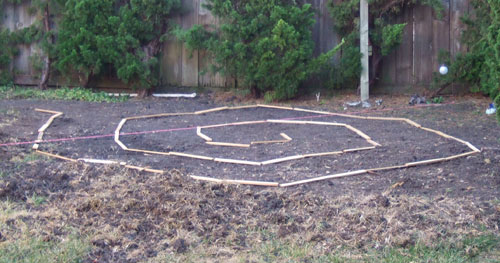
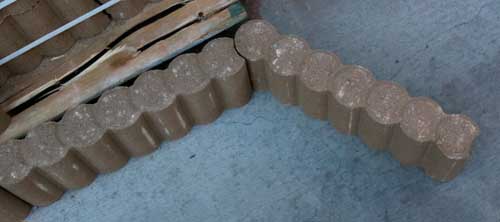
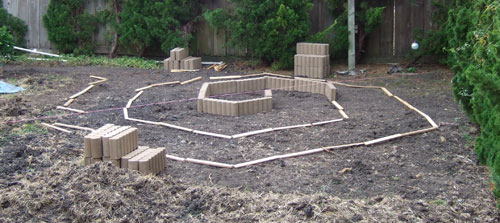
This is just over a month later on 7 November 2009. I have spent the
previous weeks scraping up most of the lawn from the corner of the
yard. I have laid out a marker string and some pieces of kindling wood
which coincidentally were the same size as the concrete edge pieces.
A few days later, on the 11th of November, and with my husband's help,
I obtained 52 concrete edge pieces, got them transported from the store
to the driveway, and from the driveway into the back yard. After all
that effort, I only had enough energy left to put 10 of the pieces into
place.
The next day, though, I laid out all the pieces. I didn't start sinking
them into the ground for a couple of days.
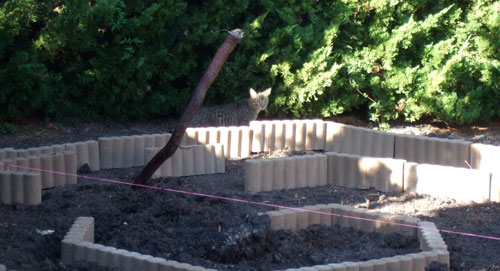
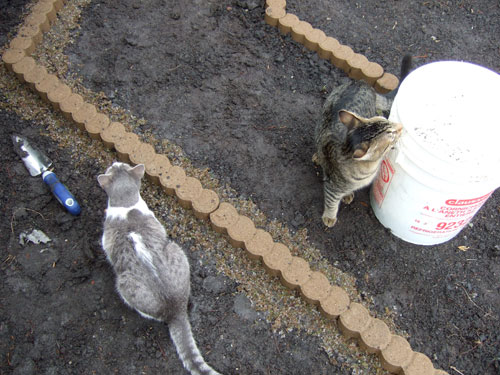
When I did start sinking them into the ground, I ran into more thick
roots. I had gotten a few big roots out during the scraping up of the
lawn. I should have known there were going to be more big roots in the
way of 'planting' the edge pieces. Here on the 17th of November, José
supervises the removal of one more large root.
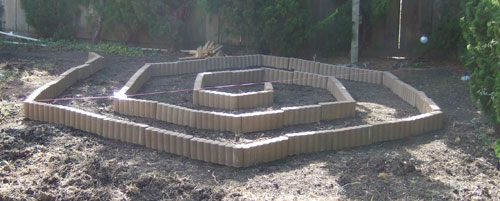
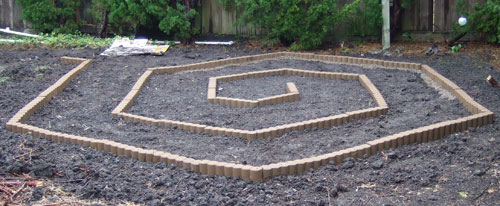
It took a long time to sink all of those edge pieces into the ground.
This photo shows the progress as of 3 December 2009. I don't have
photos from the day when I finally sank the last edge piece (I think it
was Saturday the 5th), but right after I got that piece into the
ground, my husband came out to see the progress. I told him that I had
sunk the last piece and was about to walk it for the first time with
all the pieces in place. He walked it with me, following right behind
me.
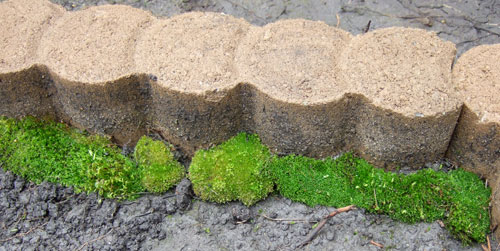
Another part of the plan is to encourage moss to grow around the
labyrinth. That corner of the yard had been quite mossy at one point,
but I am pretty sure that the landlord had the yard guy do something
about it. Now that we're in charge of taking care of the yard, I hope
that the moss will come back in force. This photo comes from the 11th
of December and shows Princess and José helping me apply the 'moss
milkshake' that I ordered from Moss Acres.
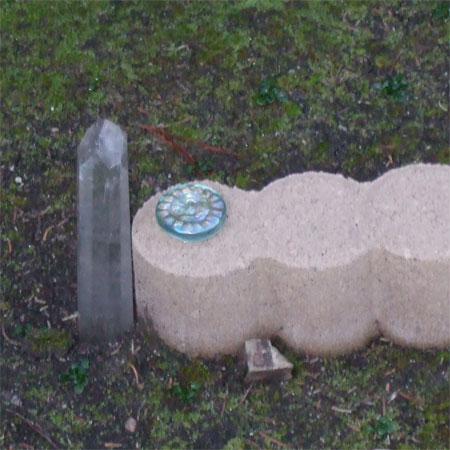
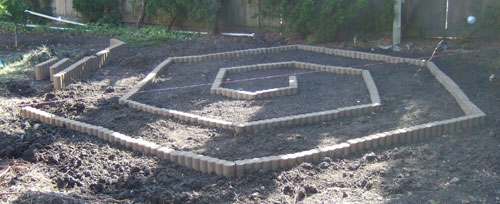
Also from the 11th of December, this photo shows all edge pieces sunk
into the ground, and the dirt mostly packed down. It had been raining
for days, though, and trying to pack the mud down ended up caking
comical amounts onto the bottoms of my shoes. The 'moss milkshake'
didn't go too far. As I write this, it is the wee hours of the 21st of
December (in the midst of the Yule Vigil, actually!) and the moss from
the 'milkshake' has yet to start turning green. The instructions say to
mist it three times a day, but that was one reason I applied it during
the rainy season. For the first two days that I tried misting it, I
used the hose which barely stretches across to that part of the yard.
For the past few days, I've used a misting spray bottle. That's really
nice because it gets me out there walking the labyrinth three times a
day and spending some time while doing it.
The project is not 'done' exactly. I'm not sure how it will evolve from here, other than I hope that the moss from Moss Acres will turn green and will grow. I have also tried transplanting some moss from other parts of the yard. That moss is quite green, but not nearly as wide or extensive as the areas covered by the purchased moss. The instructions for that purchased moss imply that it can be many months before it really starts growing at all.
"Moss fragments should begin to green up and cover thinly in about 2 - 4 months. Moss will begin to thicken up and become a solid green carpet within about 12 - 18 months."
It's been a work in progress for a little over 11 weeks now. I guess I can't really be 'done' with the project for another year at least!
Update 17 February 2010:
For a couple days after Pantheacon, Rae hung out at my house and we played in the yard. A lot of what we did was not just focused on the labyrinth, though we did spiff it up quite a bit:
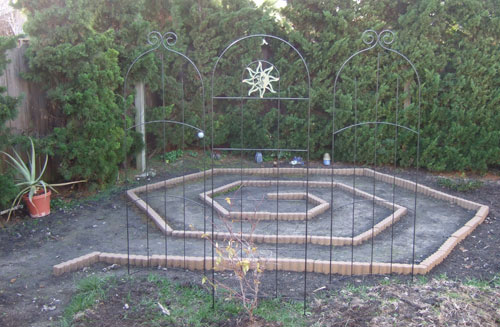
The trellises are new, though I had seen one with a sun on it (as it turns out a totally different style) back when I took the very first photo on this page of the concrete edge pieces. The three trellises were put in place, and a star jasmine I had in a pot was planted in front of the sun trellis. The jasmine had been unhappy about being in that pot all the past few years, so it was ready to give up unless it got moved into the ground. It may still not make it, though I have high hopes that it's going to take off. Another plant which got put into the ground (possibly a mistake) is along the back right edge, and it's a spearmint plant. The giant potted aloe vera on the left side is but one of many aloes that Rae repotted for me.
One thing I've been really happy about with the labyrinth is how much native moss is coming in all around inside it. This photo is the one spot where orange lichen has started growing in the path. All the moss that is in this photo is spontaneous:
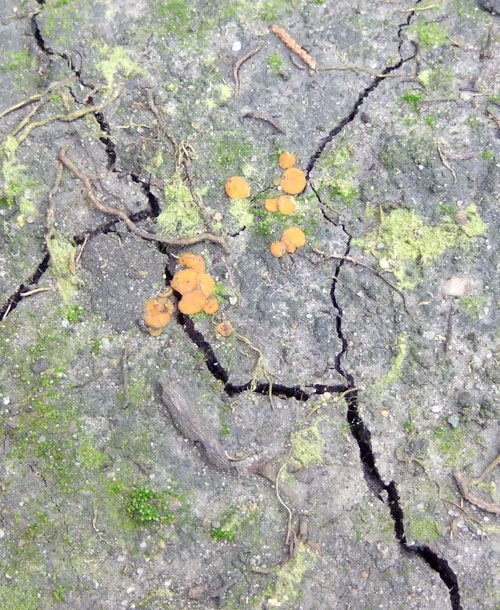
The lichen above consists of orange spots no larger than a quarter inch or so. The next photo is of some of the moss I transplanted from other parts of the yard about the same time I put on the moss milkshake: